These instructions describe how to create a password-protected area.
Please note that these steps require you to have the necessary rights and to be familiar with the administration of OpenCms, especially the management of permissions in OpenCms.
These instructions describe how to create a password-protected area.
Please note that these steps require you to have the necessary rights and to be familiar with the administration of OpenCms, especially the management of permissions in OpenCms.
In order to be able to use these settings optimally, advanced technical understanding and knowledge of HTML and CSS are helpful.

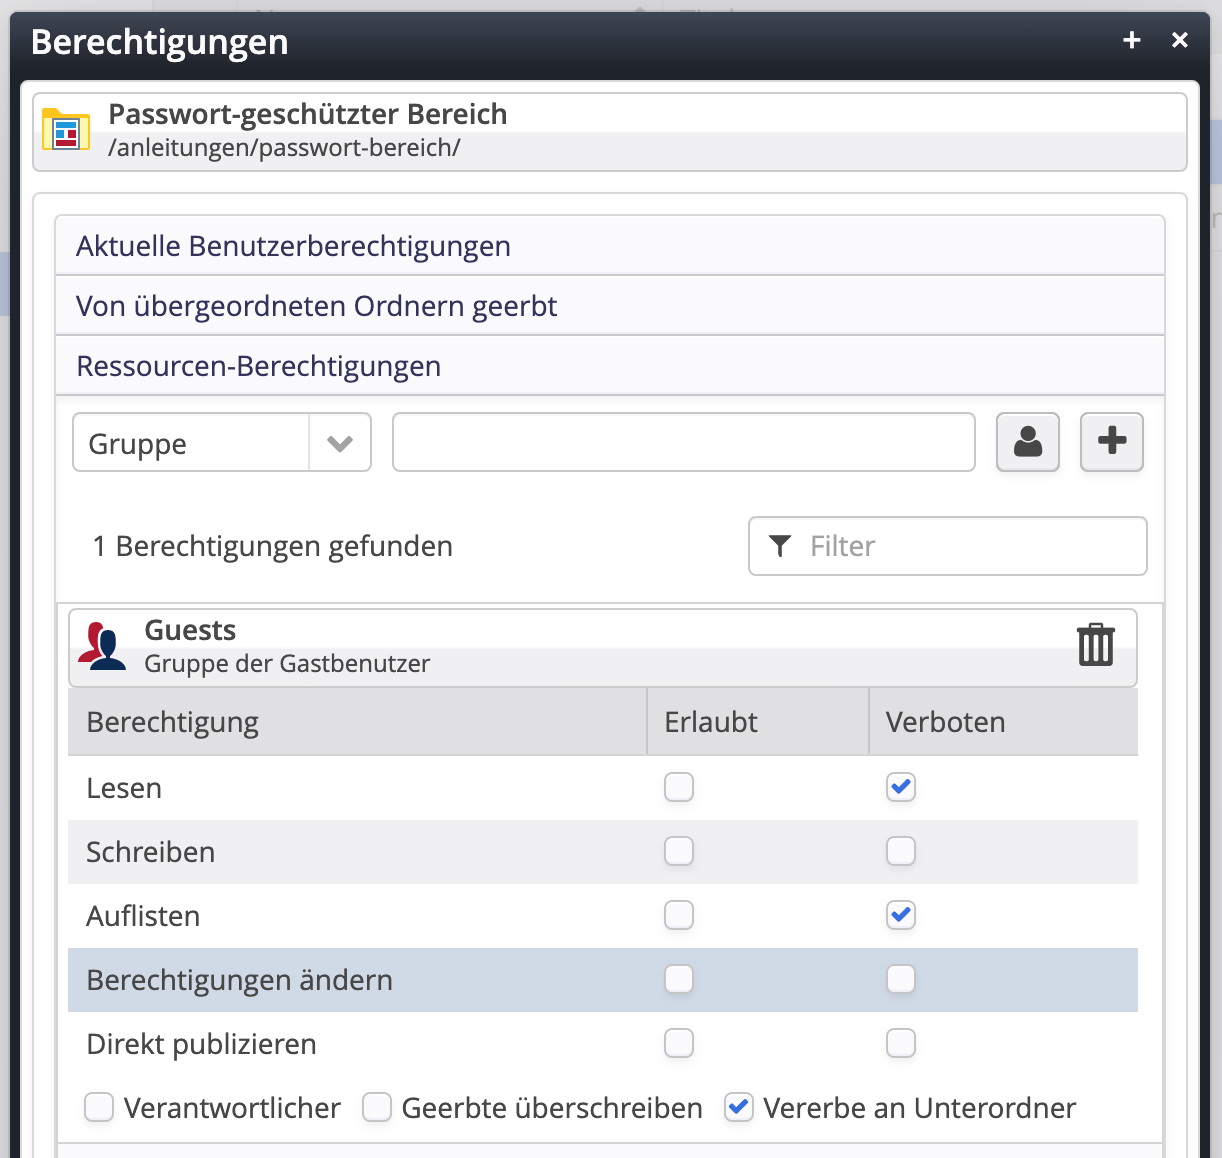
In the Permissions dialog, you must now set the desired access permissions.
To do this, select a group using the “User” icon and add it to the permissions list for the selected folder using the “+” icon.
In our example, we are revoking all rights for guest users in the folder /anleitungen/passwort-bereich/.
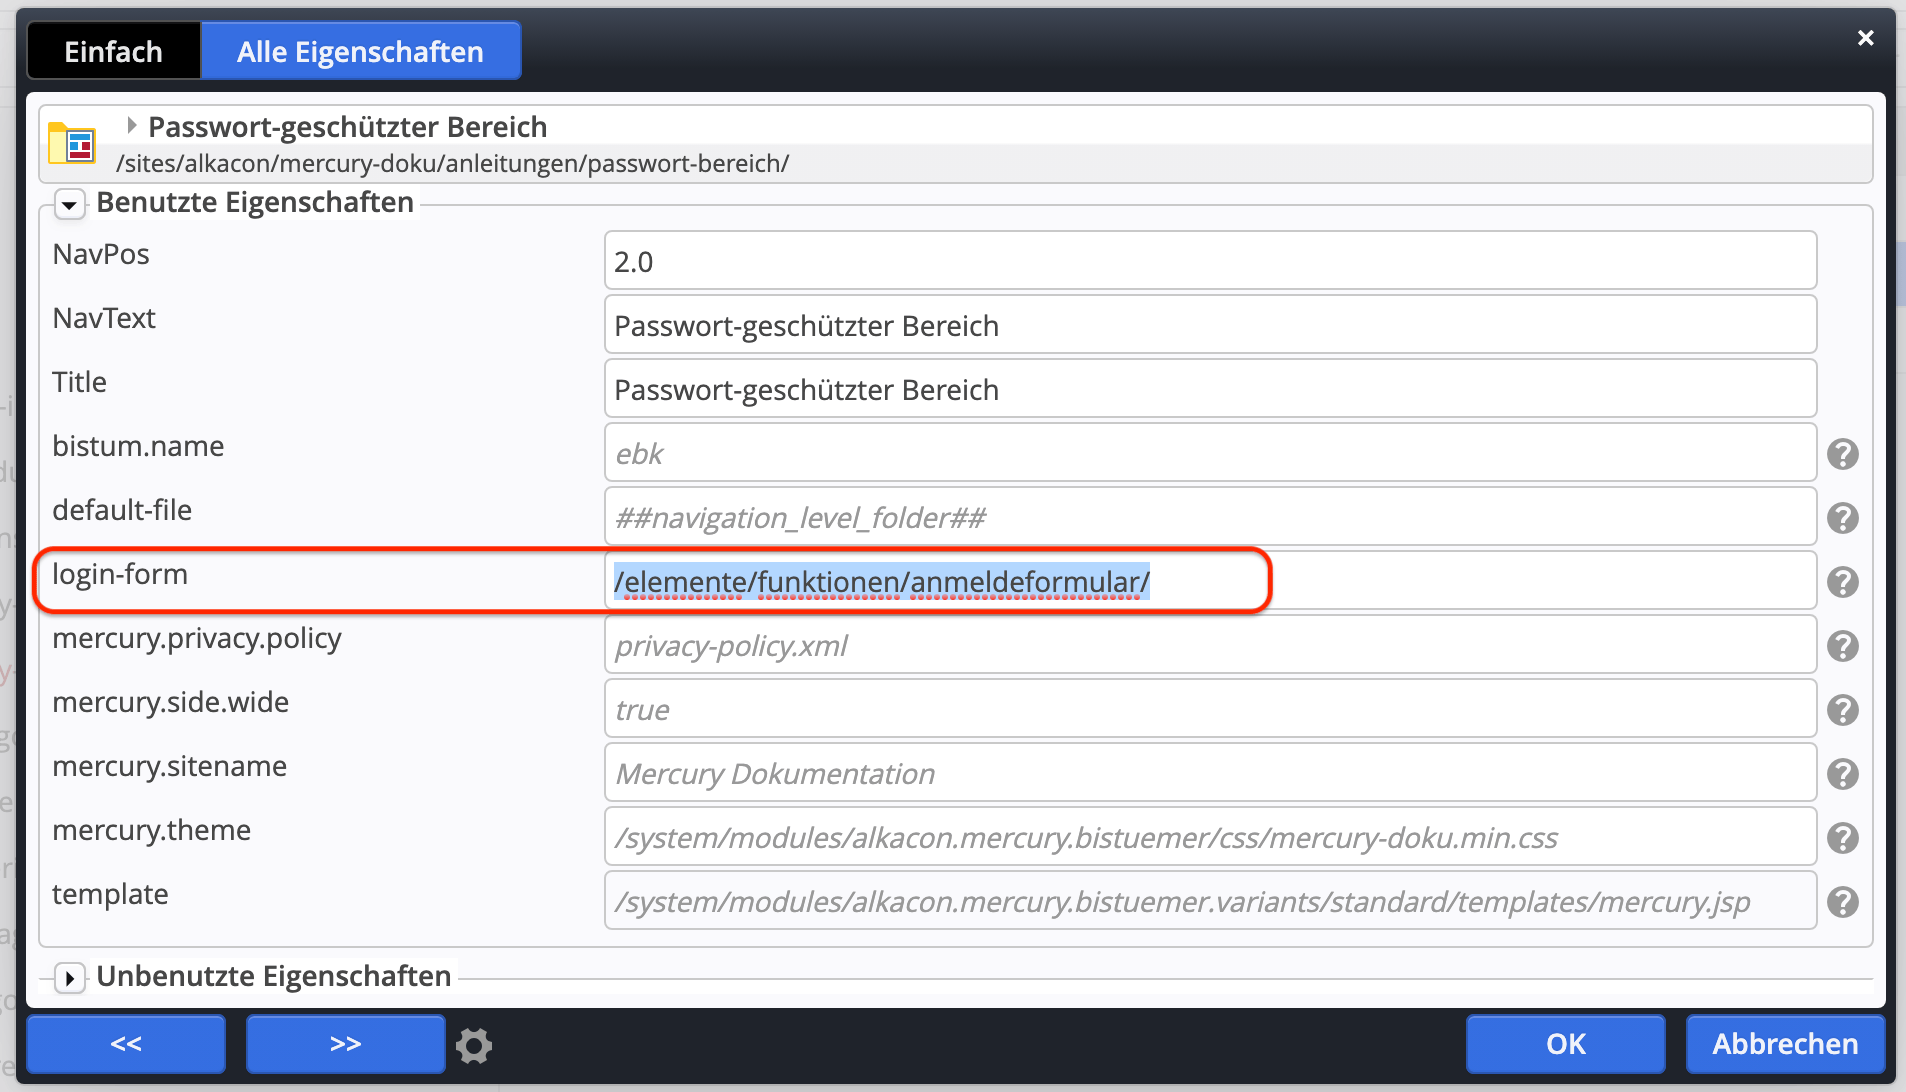
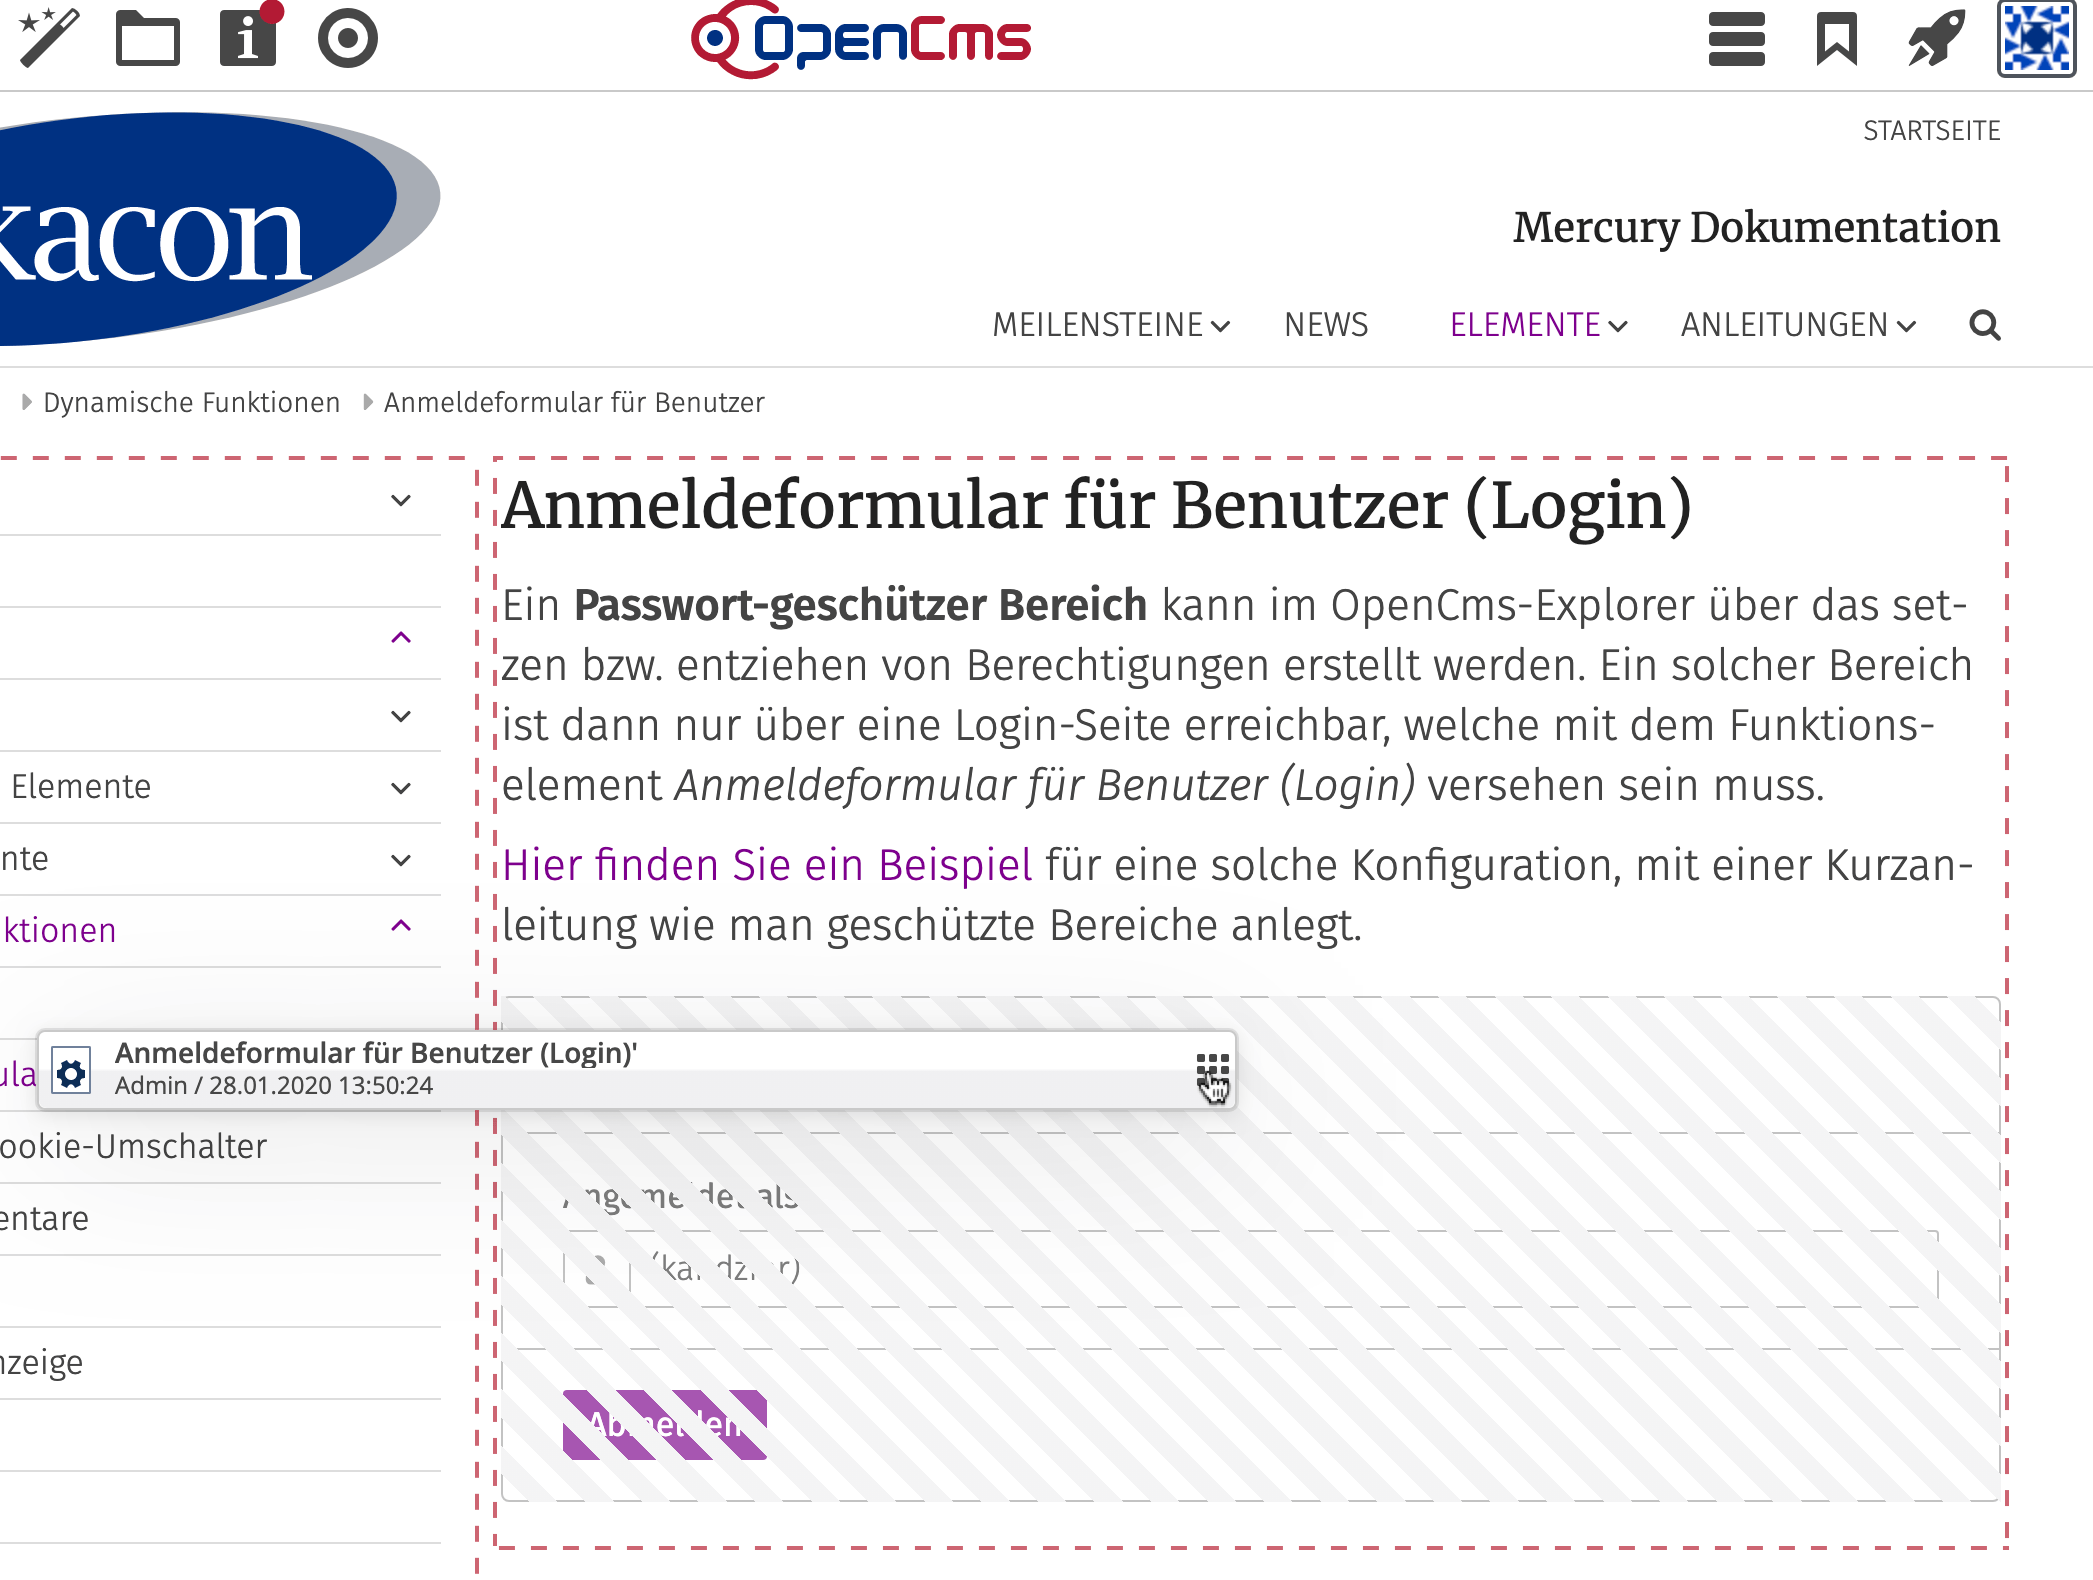
After the permissions have been set, you must specify where the login form is located in the properties of the protected area's start folder.
This is controlled by the login-form property.
In our example, the page /demo/funktionen/login should contain the login form, so the login-form property is set accordingly.
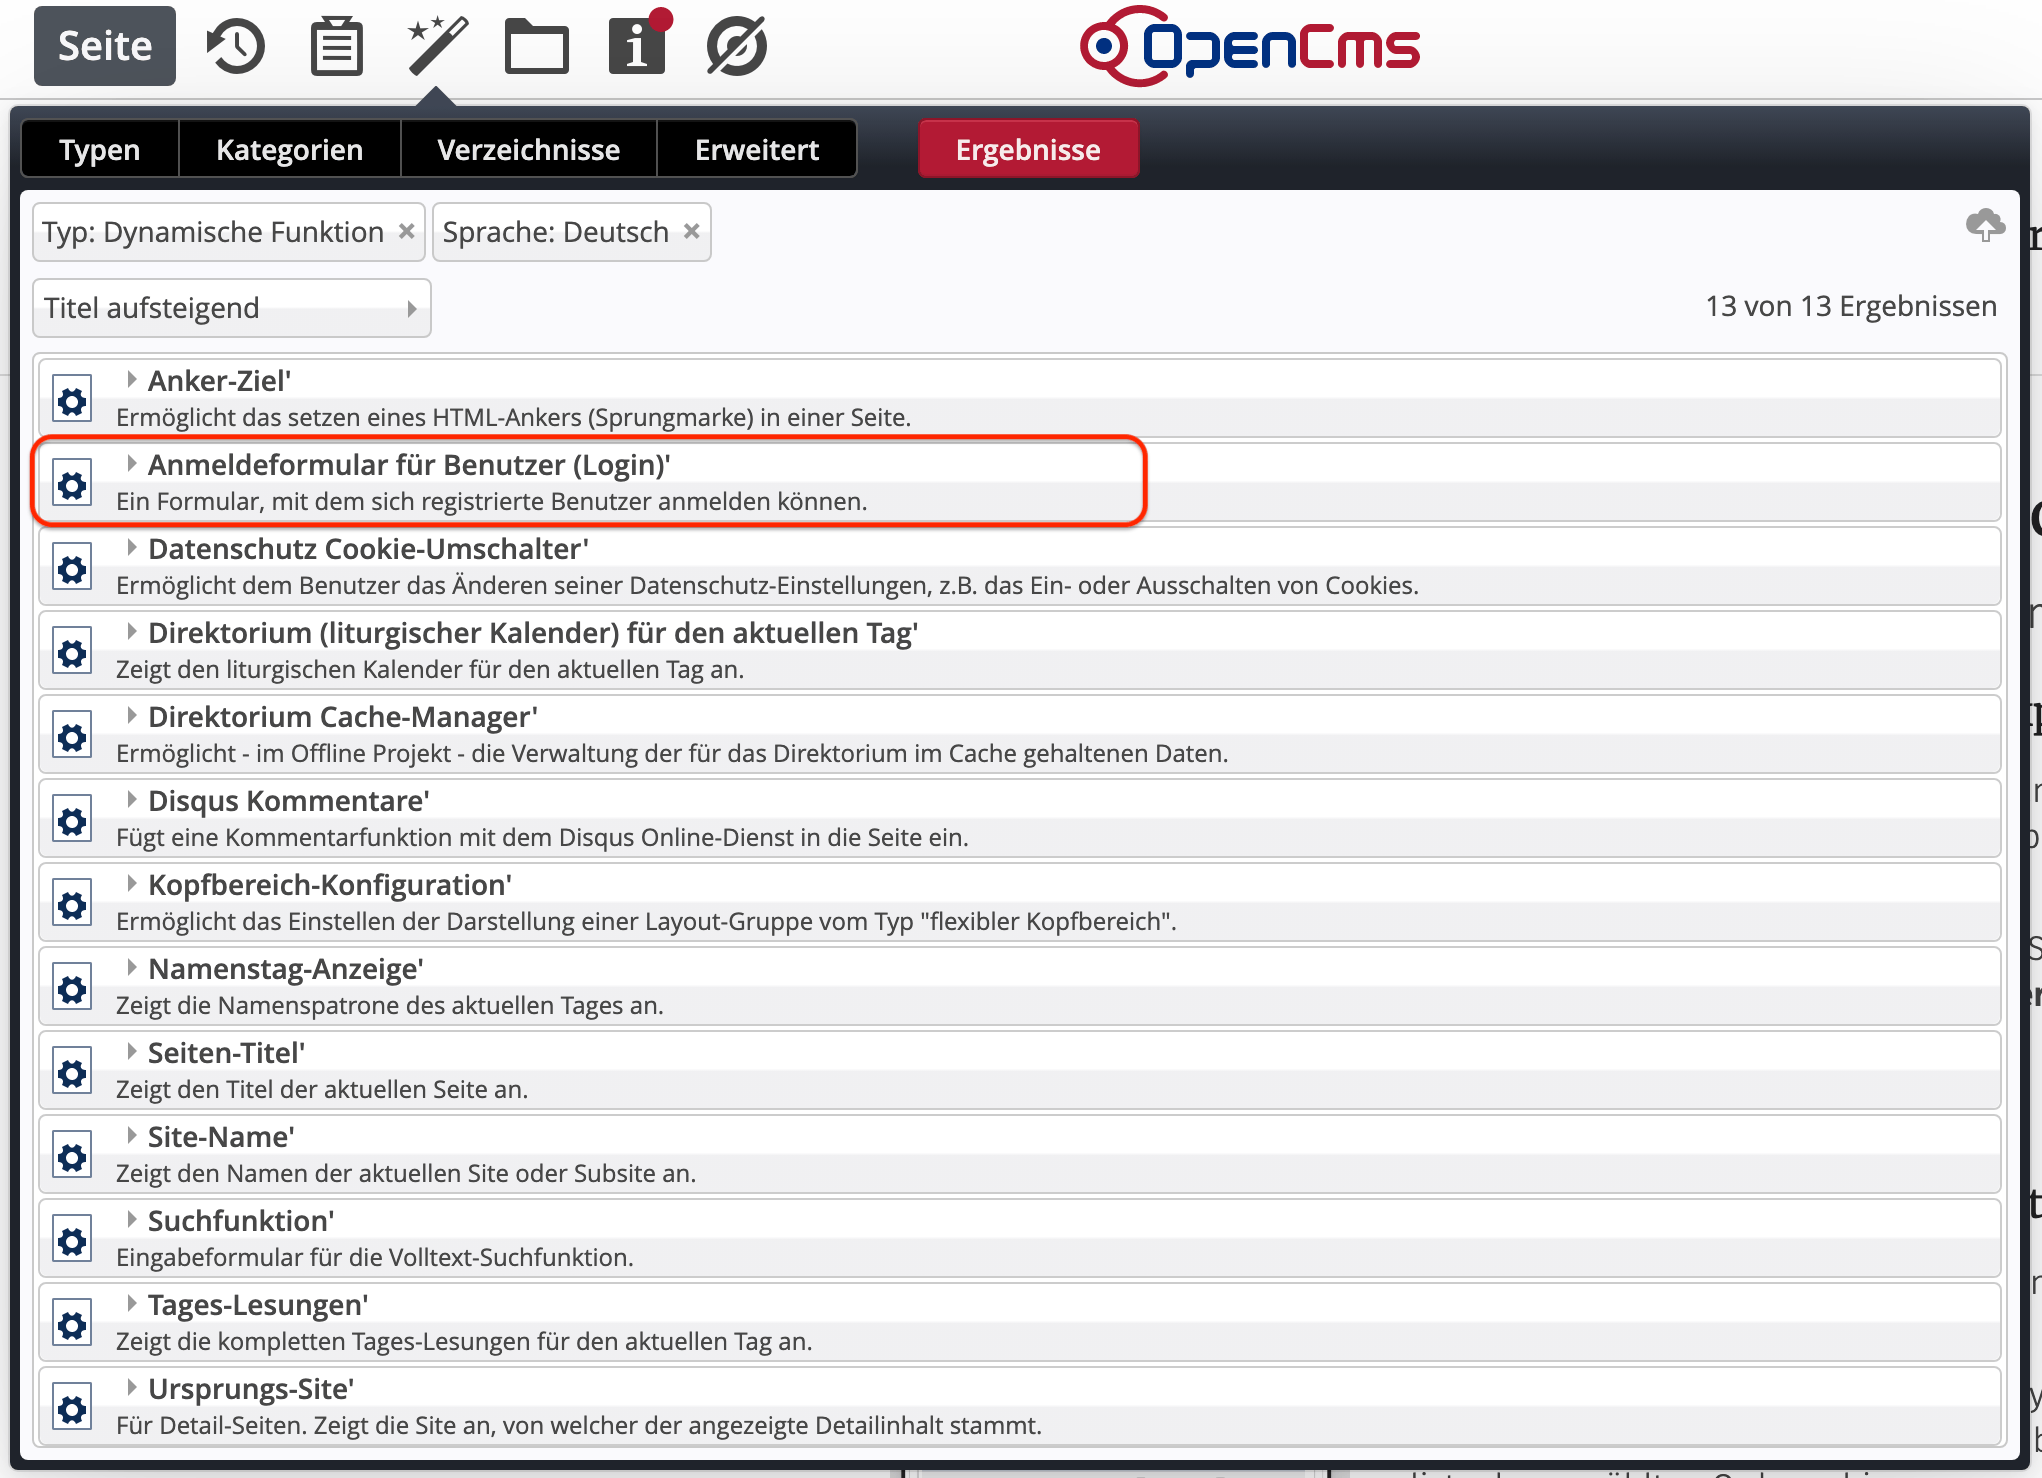
In the page editor, you must first select a page for the login form. You can use an existing page or create a new page specifically for this purpose.
Die Seite /elements/functions/loginform/ wird in diesem Beispiel verwendet.
In the Add Content dialog box (“magic wand”), first select Advanced Elements and then Dynamic Function. There you will find the Login form for users element.